How to Install a Ceramic Tile Floor
-
font size
decrease font size
 increase font size
Video
Ceramic tile is a common choice among flooring materials, especially for kitchens and bathrooms. It comes in so many types, colors, textures, and sizes that the design possibilities seem unlimited. Despite this wide variety of design options, the installation of a ceramic tile floor typically follows a series of basic steps, and ceramic tile can be laid over just about any type of subfloor. It is a project that many DIYers can accomplish with a few tips and a little patience. Join our host, Jeff Wilson, as he demonstrates how to install a ceramic tile floor.
How to Install the Substrate
Necessary Tools
- Concrete backer board
- Backer board fasteners
- Power drill
- Tape measure
- Pencil or marker
- Chalk line
- Circular saw
- Carbide-tipped scoring tool
- Straightedge
- Level
- Pointed trowel
- Notched trowel
- Thinset mortar
- Buckets
- Water
- Mixing stick or mixer drill attachment
- Knee pads
- Safety glasses
- Gloves
- Ceramic tile
- Tile spacers
- Grout
- Grout float
- Sponge
- Rags
The first step in any successful floor tile project is to install a solid substrate, or underlayment. Since we have a plywood subfloor, we need to install concrete board so the tiles properly bond to the floor.
-
Prior to installing the concrete board, mix up some latex-modified thinset mortar to use as a setting bed for the concrete board. Thinset mortar typically comes in powder form and is mixed with water. Always check the manufacturer�s instructions to determine the proper ratio of powdered mortar to water. Add the powdered mortar in a five-gallon bucket and slowly mix in water. Mix the thinset to a "peanut-butter-like� consistency. Quick Tip: Wear a dust mask and safety glasses to minimize exposure to dust from the powdered mortar. Quick Tip: A mixer attachment for a power drill makes� mixing the thinset mortar and grout much easier on the hands and arms.
-
Once the thinset has been mixed, it needs to slake (rest) for about 10 minutes. Stir it again briefly after the slaking process to ready the thinset for application.
-
Begin by spreading the thinset mortar with a 3/8� notched trowel on the plywood subfloor. Spread the thinset evenly with the notches perpendicular to the long dimension of the board.
-
Drop the concrete board into place with the printed side up and apply weight to it so it settles into the mortar. Depending on the size of the space, it is typically best practice to stagger the joints of the concrete boards. Quick Tip: Work in small areas to prevent the thinset mortar from setting up prior to the installation of the concrete board. The majority of concrete backer board products are approximately 3� x 5�, so a good rule of thumb is to spread thinset for one piece of concrete board at a time.
-
Use concrete board screws to fasten the concrete board to the subfloor. Locate screws about every 8� around the edge, and about every 10" � 12� in the middle of the board.
-
To cut the concrete board, use either a regular circular saw with a carbide-tipped blade (although the blade will get dull fairly quickly) or a simple carbide-tipped scoring tool. If the majority of cuts are straight, the scoring tool has the advantage of keeping the concrete dust to a minimum. Measure carefully, and use a straightedge to keep the scoring tool on track. It may be necessary to make several passes with the scoring tool. Once a deep gouge has been made in the concrete board, it can be snapped right along that line.
-
Once all of the concrete board substrate has been laid and fastened, it is time to finish, or seal, the joints. The joints need to be reinforced with thinset mortar and fiber-mesh tape, in a manner similar to taping drywall joints. Spread a layer of thinset and work it into the joint. Lay a strip of fiber-mesh tape into the bed of mortar and smooth out the joint with a thin topcoat of mortar.
-
Give the concrete backer board substrate a full day to set and cure prior to beginning the tile installation.
How to Install a Ceramic Tile Floor
In preparation for laying the ceramic tile, it�s a good idea to spend a few minutes gaining an understanding of the characteristics of the specific tile and design you have chosen. If you are working with a specific pattern, it can be helpful to dry-fit or dry-lay a portion of the floor to identify any potential problems with the layout. This dry-fit will afford you the opportunity to make adjustments before the tile is set in place. A dry-fit will also help you to understand how to manage the joint spacing. Although most tiles are fabricated to have little variation in size and squareness, some tiles are made to have a more natural look and to have more size variation.
-
If necessary, mark or chalk guidelines for the floor layout. Marking a grid of guidelines will allow you to quickly notice if the tile is running outside the planned layout. It is important to determine the best spot to begin the tile installation so that you can exit the space.
-
Mix some thinset mortar as described above for setting the concrete backer board substrate.
-
Use a notched trowel to spread the thinset mortar in a manageable area (about as big an area as can be laid in 10 minutes) and work it onto the backer board. Cover the entire surface with a consistent bed of mortar and keep the grooves oriented in the same direction. The grooves in the mortar will allow any air under the tile to escape, minimizing air pockets and insufficient bonding.
-
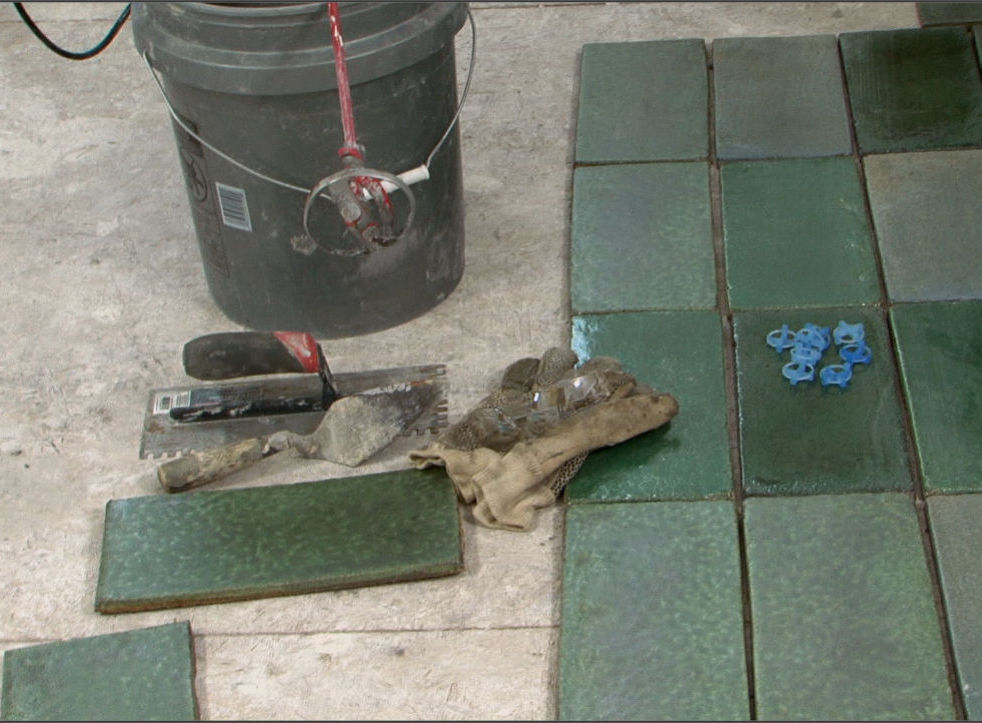
Set the tiles into place and gently wiggle them to ensure full coverage of the thinset and to eliminate any air beneath the tile. Use spacers to keep the tile straight and check the guidelines to keep the layout on track. Remove any excess thinset in the joints to allow enough room for the grout.
-
Inevitably, you will need to cut some tiles. Of the many ways to cut tile, the most common methods are with a diamond-tipped wet saw or a tile cutter. The wet saw is similar to a table saw and has a water-cooled, diamond-tipped blade that grinds through just about any type of tile and is best for making complicated cuts and notches. Slide the tile slowly into the blade and let the saw do most of the work. Be sure to keep the water reservoir on the saw filled to keep the blade cool. Wear safety glasses, gloves, and ear protection when using a wet saw. Quick Tip: Use a china marker or crayon to mark the tile where it needs to be cut. The china marker does not easily wash off the tile surface when using the water-cooled wet saw. Quick Tip: When installing small cut pieces, it can be helpful to spread some thinset mortar on the back of the tile to ensure proper adhesion.
How to Grout a Ceramic Tile Floor
After the ceramic floor tile has set for 24 hours, grout the floor. Two types of grout are available for ceramic tile, sanded and unsanded. Sanded grout contains sand and works best with wider joints, typically an 1/8� and larger. Unsanded grout does not contain sand and should be used with tighter joints, an 1/8� or less, or between tiles that can be easily scratched, such as glass or granite. Both sanded and unsanded grouts are available in a variety of colors to complement any tile.
-
Most grout comes in powdered form, so the first step is to mix a batch of grout. Mixing the grout is very similar to mixing thinset mortar. Add the powdered mixture and water in an appropriately sized bucket, mix to a peanut-butter-like consistency, and let it sit, or slake, for about 10 minutes.
-
While the grout mixture is slaking, double-check the gaps between the tiles to ensure that they are free of loose debris and deep enough for adequate grout coverage.
-
Use a rubber float to smear the grout mixture over the ceramic tile, working the grout into the joints. It is best to work diagonally across the tiles to ensure that the grout fills all the space between the tiles. Use the edge of the grout float to gently scrape off any excess grout, pushing it into the unfilled joints. Joints abutting a different material should be left unfilled. If these joints are exposed, they should be caulked to allow for the expansion and contraction of the different materials to minimize cracking.
-
After about 10 or 15 minutes, stop grouting and begin washing any excess grout from the surface of the tiles. This is perhaps the most important step in the process, because the grout sets up more quickly than the thinset � once it dries on the surface of the tile, it can be very hard to completely remove. Using a heavy-duty sponge and plenty of water, gently wipe clean the surface of the tile and rinse the sponge. Make sure to wring out the sponge well each time it is rinsed: using too much water can weaken the grout. Repeat two or three times or until the surface of the tile is clean. It is best to work diagonally so as not to gouge the grout lines too deeply. (The goal is to clean the tile surface and smooth out the grout lines, not to remove the grout.) Be sure to keep changing the water frequently, because using clean water will minimize the number of times it takes to get the tile surface clean.
-
Finally, after the grout has set for a few hours, use a dry rag or buffing pad to polish the tile and clean any remaining grout that is stuck on the surface.


Ryan Carpico
Ryan is a Registered Architect who earned a Bachelor of Architecture from the University of Kentucky in 1998. His experience in a broad spectrum of architectural projects includes design and project management in multi-family residential, general commercial, and institutional projects. This architectural experience is balanced with a background in general contracting of residential and light commercial construction projects. Ryan�s knowledge and ability as both architect and builder enable him to address both the technical and practical sides of the comprehensive body of construction knowledge.
Website: carpicodesign.com/